If you want to know how to write a blog with Jasper.ai(previously known as Jarvis.ai), you have come to the right place. From signing up at Jasper to posting a blog, we will discuss everything in detail here. Let us start with the working of Jasper.
Working of Jasper.ai:
Working with Jasper is quite simple and convenient. Summarized below are the three main steps involved while using Jasper AI.
- Selecting a template that suits your writing type
- Filling in the required details (Title, keyword, Intro, etc.)
- Choosing among the suggestions given by Jasper AI.
With these three basic steps, you can generate any kind of content you want for your business. At least this is what a human eye goes through while using Jasper, but what happens inside is much more complex. Jasper uses the GPT-3 framework to write the content. It reads material from the internet and understands which different styles of human write. There is complex programming going on, which analyzes the best match of your requirements. The more you use Jasper, the more it becomes familiar with your writing style and follows the pattern in the rest of the articles.
Select Jasper AI Boss Mode Plan

Usually, you see different plans on Jasper.ai; a Starter Plan and Boss Mode. In Starter Mode, you get to generate short text, like headlines and tweets, or product descriptions. Whereas in Boss mode, you get long content in addition to the Starter Plan.
Therefore, to start a blog you must be in Boss Mode. Upgrade your plan if you are already on the Boss Mode plan. It starts from $59/month and increases with the amount of content you generate in a month. The feature allows you to write long articles in a short time span with unlimited logins. It allows access to Jasper Commands while supporting the SEO style. It has a plagiarism checker like Grammarly as well.
After the selection of Mode, you need to follow the following steps to generate a complete blog post using Jasper.
Select the Document Type:

Jasper.ai offers multiple types of writing styles at the first stage. It gives you the option of long-form assistance, multiple-choice questions, summaries, business/product names, press releases, engaging questions, and titles/descriptions. For writing a blog post, you have to go with the long-form assistance option.
As soon as you select the long-form assistance option, you are asked to select the workflows. Jasper AI gives you two options; starting from scratch or a blog post workflow.
The scratch that Jasper offers is different. Although you are writing on a blank page, the sides are filled with commands to create the content. This solves many problems that a writer is facing while writing his content.
In the blog post workflow, there is a template of the blog present. You just have to enter the required entities and select from the suggestions. Finally, you are ready to go.
Describe the Content-Type
After you select the blog post format, Jasper AI asks about the description of the content. In this place, you have to tell Jasper.ai what type of blog you are looking for. This is an important part of the whole process. This describes what your blog is going to look like. What aim is your blog focusing on that is covered by this section? For example, you can write.
- I want to write about the features of the latest car by Tesla.
- write about how to use marketing strategies.
- Email marketing best practices.
This will help Jasper.ai search for the content you require to generate your blog. You can specify it by adding more details to it.

After you are done writing the type of content, you are asked to enter a keyword, but this is optional so, it’s better to leave this blank.
This is the most important thing in your entire blog. If you are well aware of writing SEO articles, you might know what worth a keyword holds in your blog. Therefore, we suggest you search for your keyword well before start writing your blog. Put that specific keyword in the given space and enter. You can select from the options given by Jasper AI as well.
This step is extremely important as it gives a start to your blog. In this part, you help Jasper.ai to gather the content you are searching for in your blog.
Select a Blog Post Title

Once the type of content is selected, Jasper asks you for the title. You have to fill in the blank with the title you want for your blog. Either you completely write it yourself, or you get suggestions from Jasper.
Jasper.ai will also provide you with options so that you can select the best fit. There may be several options; it is totally up to you to select whichever attracts you the most. The ‘generate ideas’ option will provide you with the suggestions
Introduction generation
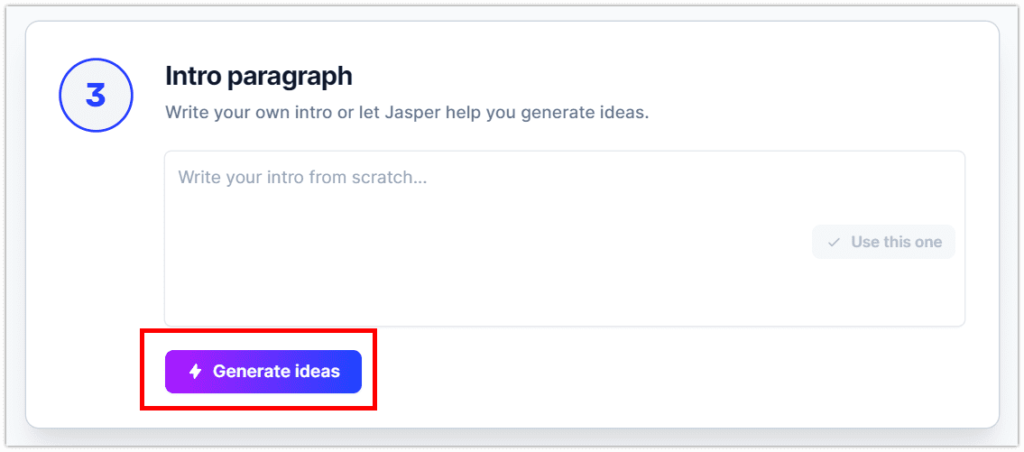
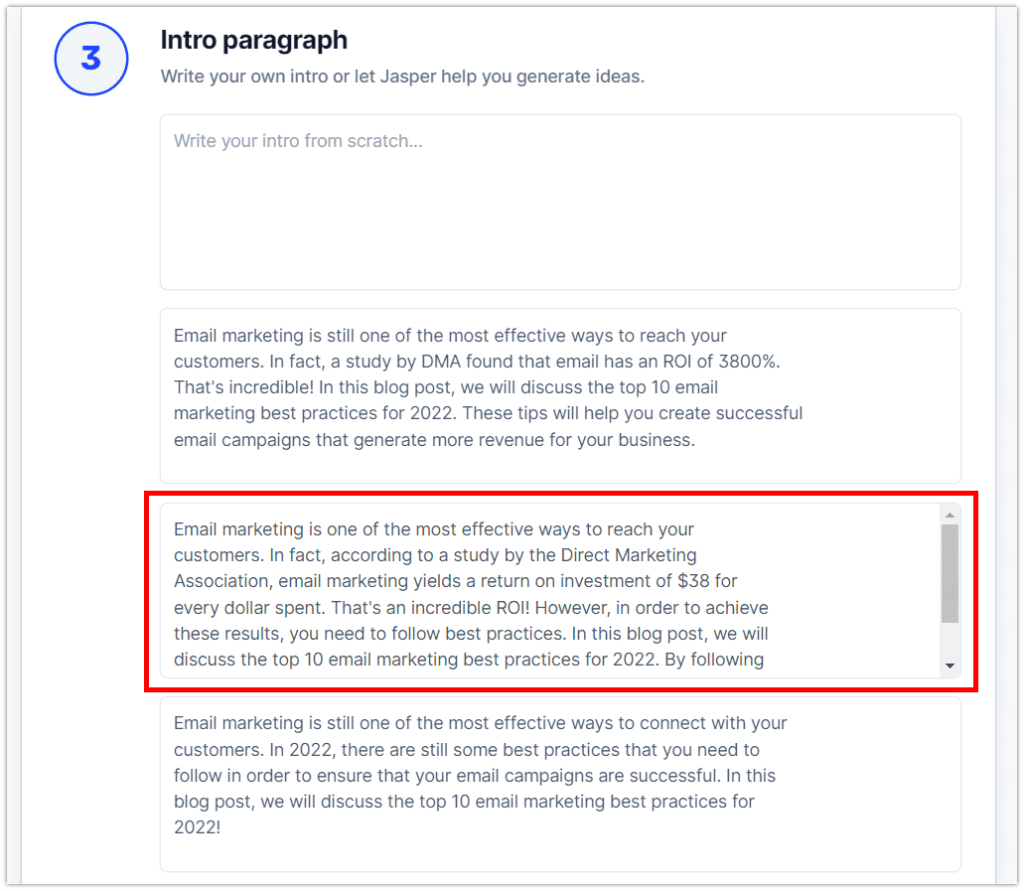
In this area, you write the introduction paragraph. Again, this section also comes up with suggestions. You can either fill it up yourself or ask Jasper to do it for you. When you select the ‘generate ideas’ option, Jasper gives you several options for intro paragraphs. Among them, you can select the paragraph you like the most. Not only this, but you can also tweak it yourself. You can eliminate or add lines to it according to your requirement.
Blog post Outline


As soon as you enter the editor, you can start working on your content. The editor part allows you to generate an outline for your blog. In this part, you direct Jasper to the content of your blog. Before filling in the page, you outline and tell Jasper you want something like that. If you want to generate high-quality content, you can also create the outline yourself. This will reduce the chances of fluff and take you straight to your template. However, if you want Jasper to do this for you, then it is just two steps away.
The alternative method to generate a blog post outline:
Write in the editor; >write a blog outline for the title “how to write SEO blogs?” and press ctrl + enter to generate the outline. If you want to re-write the outline, press ctrl+/. Note that these commands only work in Boss Mode. It is recommended that to create the outline yourself if you have a clear picture of your content. This will lead Jasper to the writing platform for your content. If you are using the ‘blog post outline template’, you need to click on the “blog post outline” template, after which you enter the title, followed by the tone of voice, and generate the AI content. You must keep editing the document yourself too.
Formatting the blog:
Jasper AI editor is quite a clean and simple window. You can edit, add headlines and rephrase, and add bullets to your text. Instead of writing long paragraphs, break them up into bullets. This increases the reading capacity of the reader. This also helps Jasper to make the text more scan-able.
Create the Blog Post
The last thing is to complete your blog. To clear a misconception, people think that Jasper will create a thousand words in a go, but it is not actually like that. Jasper divides the content into blocks, to gather more related information and reduce the risk of errors. You define a specific limit to the word count. The lower the limit, the more accurate your blog is going to be. If you don’t want to put much effort into it, you will have to compromise on quality to some extent. It is also recommended that you keep on checking the content manually before moving forward.
On the left side of the dashboard, you will find the word ‘content brief’. Here you define Jasper.ai as the content of the next block to be. If you want to cover more than one topic in your blog, you can use this feature to add related content.
You can use the ‘compose button’ if you want Jasper to continue your blog further. For example, at some point you want Jasper to continue from the point you have stopped; you click on this button and Jasper fills it with content.
You can also use the triple asterisks to make Jasper gather more specific information. Usually, content generators copy the same data repeatedly. To avoid this, you can use these triple asterisks to make the above data invisible to Jasper. Thus, copying the visible information, Jasper can bring versatility to your writing. These hacks are quite helpful in generating quality blogs.
Write a conclusion paragraph
To write a conclusion, you can ask jasper ‘>write conclusion’ and then click on compose button. It will generate the conclusion for your blog. Once again, you can edit it yourself too.
An alternative method is to use Jasper.ai copywriting templates to write conclusion paragraph.
Navigate through the templates section search “Conclusion Paragraph” select the conclusion generator, input the information hit the generate button, you’ll get different variants of generated paragraphs, select one of them which is relevant to you.
Final touch:
Once the content is built, it is time to check for final editing. This may include plagiarism. Jasper.ai is very less likely to produce plagiarism, but still, you can check for it in ‘The Jasper Plagiarism checker’.
To make the content SEO friendly, you can integrate Surfer SEO tools. You can edit and manually make the content SEO-friendly as well. You can also use Google SERP to add FAQs to your blog. And finally, your blog is ready to be published.
You can add more features to it by integrating various tools with Jasper. These are the nine easy steps involved to create a blog using Jasper.ai. Now you are ready to use Jasper for creating your blog post on the go.
